Retrobatch Helper
While I don’t do a lot of image editing, I do more than I think most of the people I know do. For the longest time, now, I’ve used scripts and hacks to try and wrangle things like creating consistent thumbnails, featured image sizes and even just memes. Getting consistent results is somewhat flakey, and it seems like every time I turn around, my scripts break in new and interesting1 ways.
So, because I’m exploring this brave new-old world of macOS applications that I wasn’t previously aware of. I decided to give Retrobatch a try. Retrobatch is by the same folks (Flying Meat Software) that make the excellent Acorn image editor that I had a copy of in the past. The main thrust of the application is to setup a pipeline of nodes that act on images fed into it by various means. These nodes can be configured further to alter the image in several ways and can even split off into multiple branches for alternate streams.

Making a simple blog post image
Workflows can be pretty simple
These workflows can even shell out to scripts, incorporate AppleScript, download files and much more. You can really get into lots of processing with this tool, but I find where it really shines is when you create “Droplets”.
Droplets are a simple app wrapper around the Retrobatch workflow tool. It allows you to drop images on the app and have it automatically process images without having to open the app, then the workflow, then adding images to process. This makes it much easier to integrate into a blogging workflow by giving you a quick location to just drop a bunch of images and have stuff ready made for your post come out the other end.
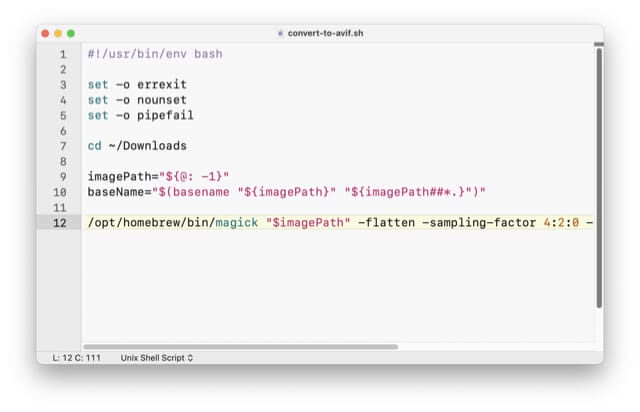
Shell scripts can be called as a part of a workflow
Shell Scripts in Workflows
Adding in shell scripts allow you to expand your world into Unix territory and
the array of tools there, like the venerable ImageMagick or FFMpeg or tools like
rsync to upload them to a server after you drop the results from the pipeline
into a temp folder. While, yes, some of this could be easily replicated in
scripts alone, you end up having to wrangle Bash or Fish as a language, and
adding new features or steps requires yet more implementation and the tendency
to break or trip you up with common pitfalls.
It’s not all sunshine and rainbows, though. Creating mutli-branch workflows kind of requires you to enable the advanced linking feature to drag connections manually.
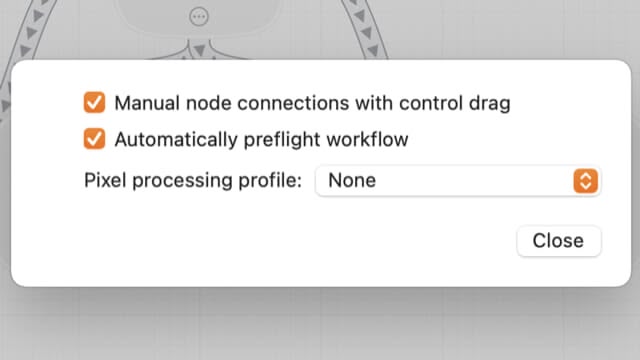
Enabling Manual Connections can be a Drag
Though it gives you much more control
The nodes also don’t really give you a whole lot of information on what they’re configured to do, leaving the only option to color-code cloned nodes to identify what one does what. The “Workflow Notes” node is just sad. This could have been a sidebar or window or some other UI feature that lets you see it while working in the editor. You also can’t quickly set color from anywhere except from the three dot menu on each node, making identifying nodes that much harder to organize.
Droplets
There is also the image of format support. Retrobatch can read many different formats, it’s not as rosy on the writing part. It seems like a hugely limited set of formats for a tool that is supposed to slice and dice images. GraphicConverter supports way more formats, and can batch save as them, but it has no processing pipeline. I feel like this could be a strong match to merge programs…
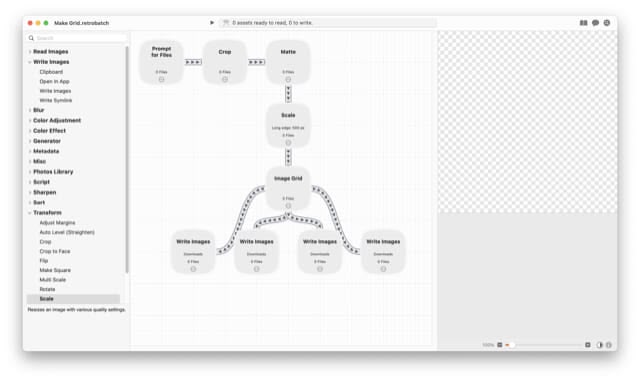
Making Grids
Anyway, one last thing that Retrobatch does that I’ve started using is the “Image Grid” node. This takes images and creates a single image that has all the included images as tiles on it. This seems to work best if you pre-shrink/crop each item beforehand, but with a little finagling, it works really well!
Read: frustrating. ↩︎